After much fiddling, my Varagyr Wolf Guard for my VI Legion Space Wolves army are finally and completely assembled and ready for a coat of paint.
If I’m honest, I’d originally planned for there to be a lot more Frost Claws in this unit, but the decision to use the claws from the Wulfen kit in order to properly differentiate them from standard Lightning Claws turned out to be something of a headache – each model either required sculpting a gauntlet over the pre-attached Wulfen hand, or using and modifying a fist from the combi-bolters and modelling some sort of grip for the claw, which I’ve done on one or two of the models.
There were a few other ‘gotcha’s in the building process – it hadn’t occurred to me that the Legion Cataphractii Power Axes I’d ordered wouldn’t come with pauldrons, and plastic pauldron bitz for Cataphractii Terminators are a scarce resource online. In the end, I settled with ordering 3x right arms from the Varagyr kit, which worked out okay.
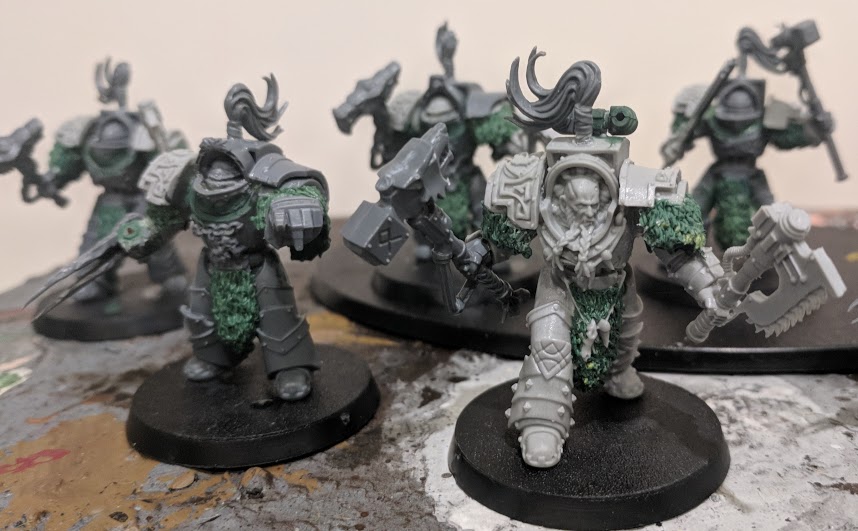
I’m overall very happy with how they’d turned out, and I’m pleased that I decided to keep consistent and sculpt my own wolf pelt tabards as well, rather than use some of the Spellcrow tabards I’ve used on Sergeants and Veterans in the past. Aside from consistency, I’m planning on entering my VI Legion into Armies on Parade someday, and so making sure I have a reasonable pull of decent looking conversions without resorting to third party bitz is somewhat essential.
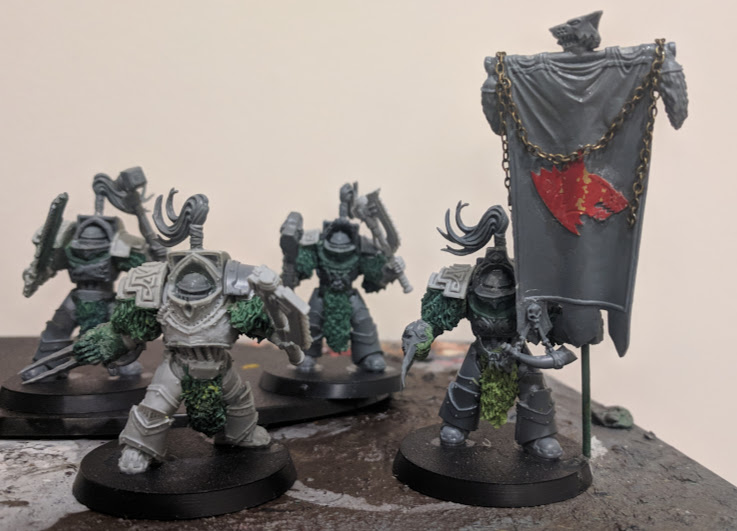
The Wolf Banner is purely decorative – I’m fairly sure standard Terminators in a Command Squad can’t come equipped with twin power weapons, and Varagyr have no standard/vexilla upgrade available to them. The decision to build a Wolf Banner originally came from a place of unsatisfaction with the pose of that particular model. Once I realised the pose was perfect for standard though, I was sold. I’ve always been a big fan of models using their power fists to hold things like standards, for reasons I’m largely unsure of. I’d tossed around the idea of sending the banner off to some commission painting service to get some really sweet freehand painted, but in the end I decided to settle for applying one of my etched brass Wolf Heads and keeping things fairly simple. I added a hobby chain for a touch of barbarism, dangled wolf tail fetishes and replaced the purity seals for an attached horn. I don’t think I’ll have to do anything too ambitious in order to make it look eye catching any more!
In other VI Legion news, I’ve recently started work on my Legion Fellblade model. There’s not a lot about building these tanks that needs to be said that hasn’t already, but it sure is easy to let it get away from you. I honestly thought I’d done a decent job with cleanup and bending the pieces, but when push came to shove, I still had minor alignment issues with the tracks, and the overall chassis is not entirely symmetrical in it’s build – at the rear of the beast, one side of the top hull extends over one side, while it sits flush with the other. Not the worst alignment issue to make, and thankfully most of my tracks issues can be covered up with the thick layers of muddy texture paint and snow I plan on slathering onto various bits and pieces, much like I’ve done in the past with my Spartan or my Sicaran Venator. Early WIP shot of the whole thing below!
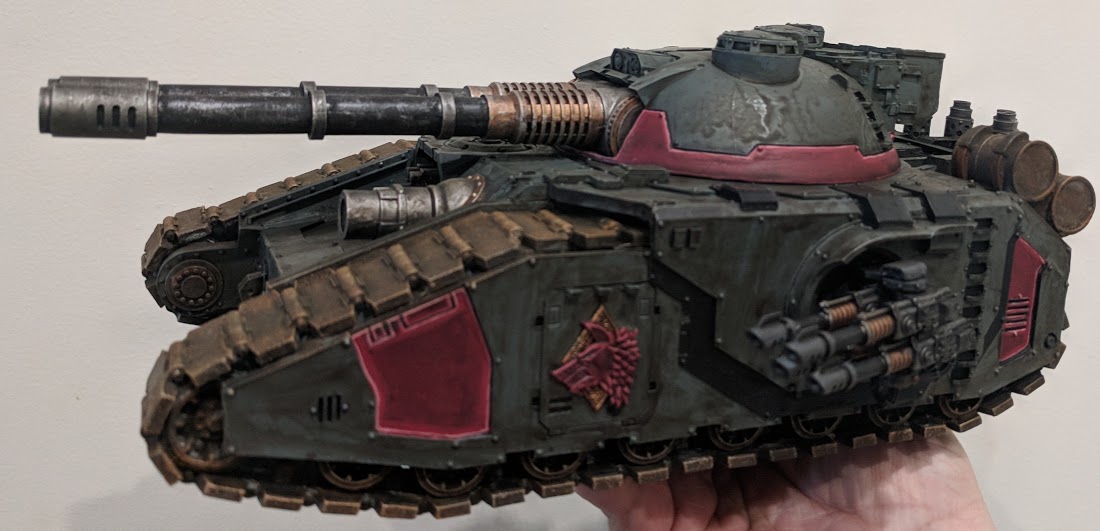
As a man without an airbrush, my general approach for Vlka Fenryka armour is just about the same as my approach to infantry – I basecoat the model in Mechanicus Standard Grey spray paint, paint certain details in Vallejo Game Scarlet Red, paint the various metallics and then completely drown the model in an all over wash of Agrax Earthshade.
This last part is probably contentious for some who prefer a ‘clean’ look on their Space Marines – particularly with armour, the general convention seems to lean towards recess shading, or at least following up the wash with some layering. I tend towards leaving the muddy, streaky, ineven wash as a top layer and then following up with some fairly stark edge highlights of Vallejo Heavy Bluegrey, and neatened and thinned with a follow up layer of Mechanicus Standard Grey. The end result is some reasonably high contrast edge highlighting over a sloppy, muddy and grim looking armour which suffers a little on close inspection, but in my opinion creates a weathered and striking look at arms length, on both Marines and Vehicles. At this point in time, I’ve managed to finish painting and sealed the turret, with the highlights on the main chassis left.
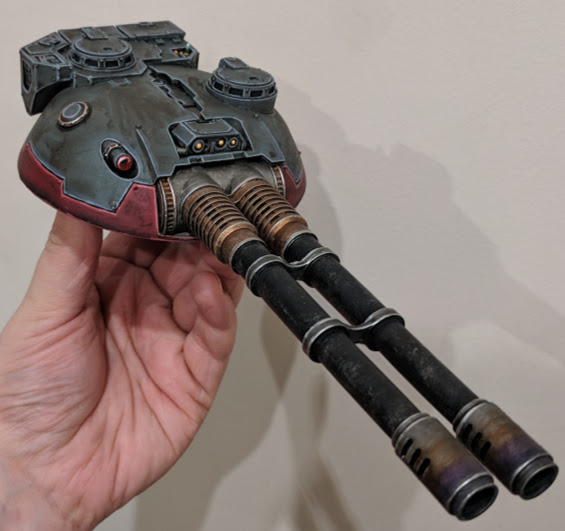
Not much to detail here beyond what I said above, other than I’d attempted to add some heat staining on the muzzle brakes of the twin accelerator cannon, which I did with four washes – Citadel Drakenhof Nightshade, Army Painter Purple Wash, Citadel Fuegan Orange and Citadel Seraphim Sepia. I’m overall fairly happy with the effect in person, although the above image looks like the Sepia layer is perhaps a bit thin – maybe just the angle or lighting, or perhaps I just need a second look in person.
The only remaining element of the paint job so far that I think deserves a mention is the tracks – I try not to spend an excessive amount of time on these, and I’ve gotten a fairly reliable formula locked down now, having attempted this on my Spartan and Sicaran Venator previously. I usually try and through a layer of Vallejo Gun Metal over the tracks and wheels, followed by a 60/40 mix of Citadel Typhus Corrosion and Water (to help it flow into the wheels and nooks a little easier), which does a nice job of staining the sheen away and adding extra texture. This is followed up with a drybrush of Ryza Rust, and then another final drybrush of Army Painter Plate Metal, focussing on the edges and ridges a little more. The end result is a rather brownish, leathery looking track with metallic undertones, as if it’s been thoroughly caked and stained with use.
Anyway, that about covers my recent VI legion progress. Thanks for reading, and happy wargaming!
