It’s starting to feel a little bit like the start of 2022 again, when my Skaven Renaissance was in full swing and I was cranking out models left right and centre. After my grand plans to expand my Space Wolves for the release of the new edition of Heresy fizzled out a bit (for the time being), Star Wars Legion has given me the kick up the ass that I needed to get back on the hobby train and start churning out minis again.
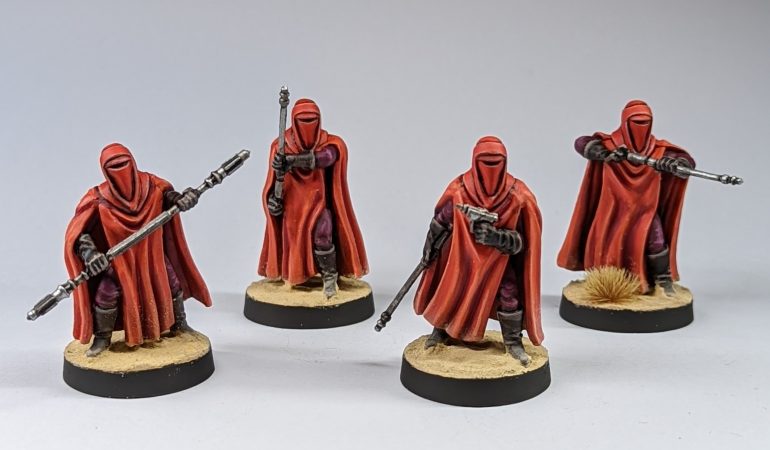
After last instalment saw me finishing an 800 point army, I’ve been working hard on some exciting new units for my Galactic Empire – and I think these latest additions have been my favourite so far. First up, we have Emperor Palpatine and a cadre of Royal Guard.
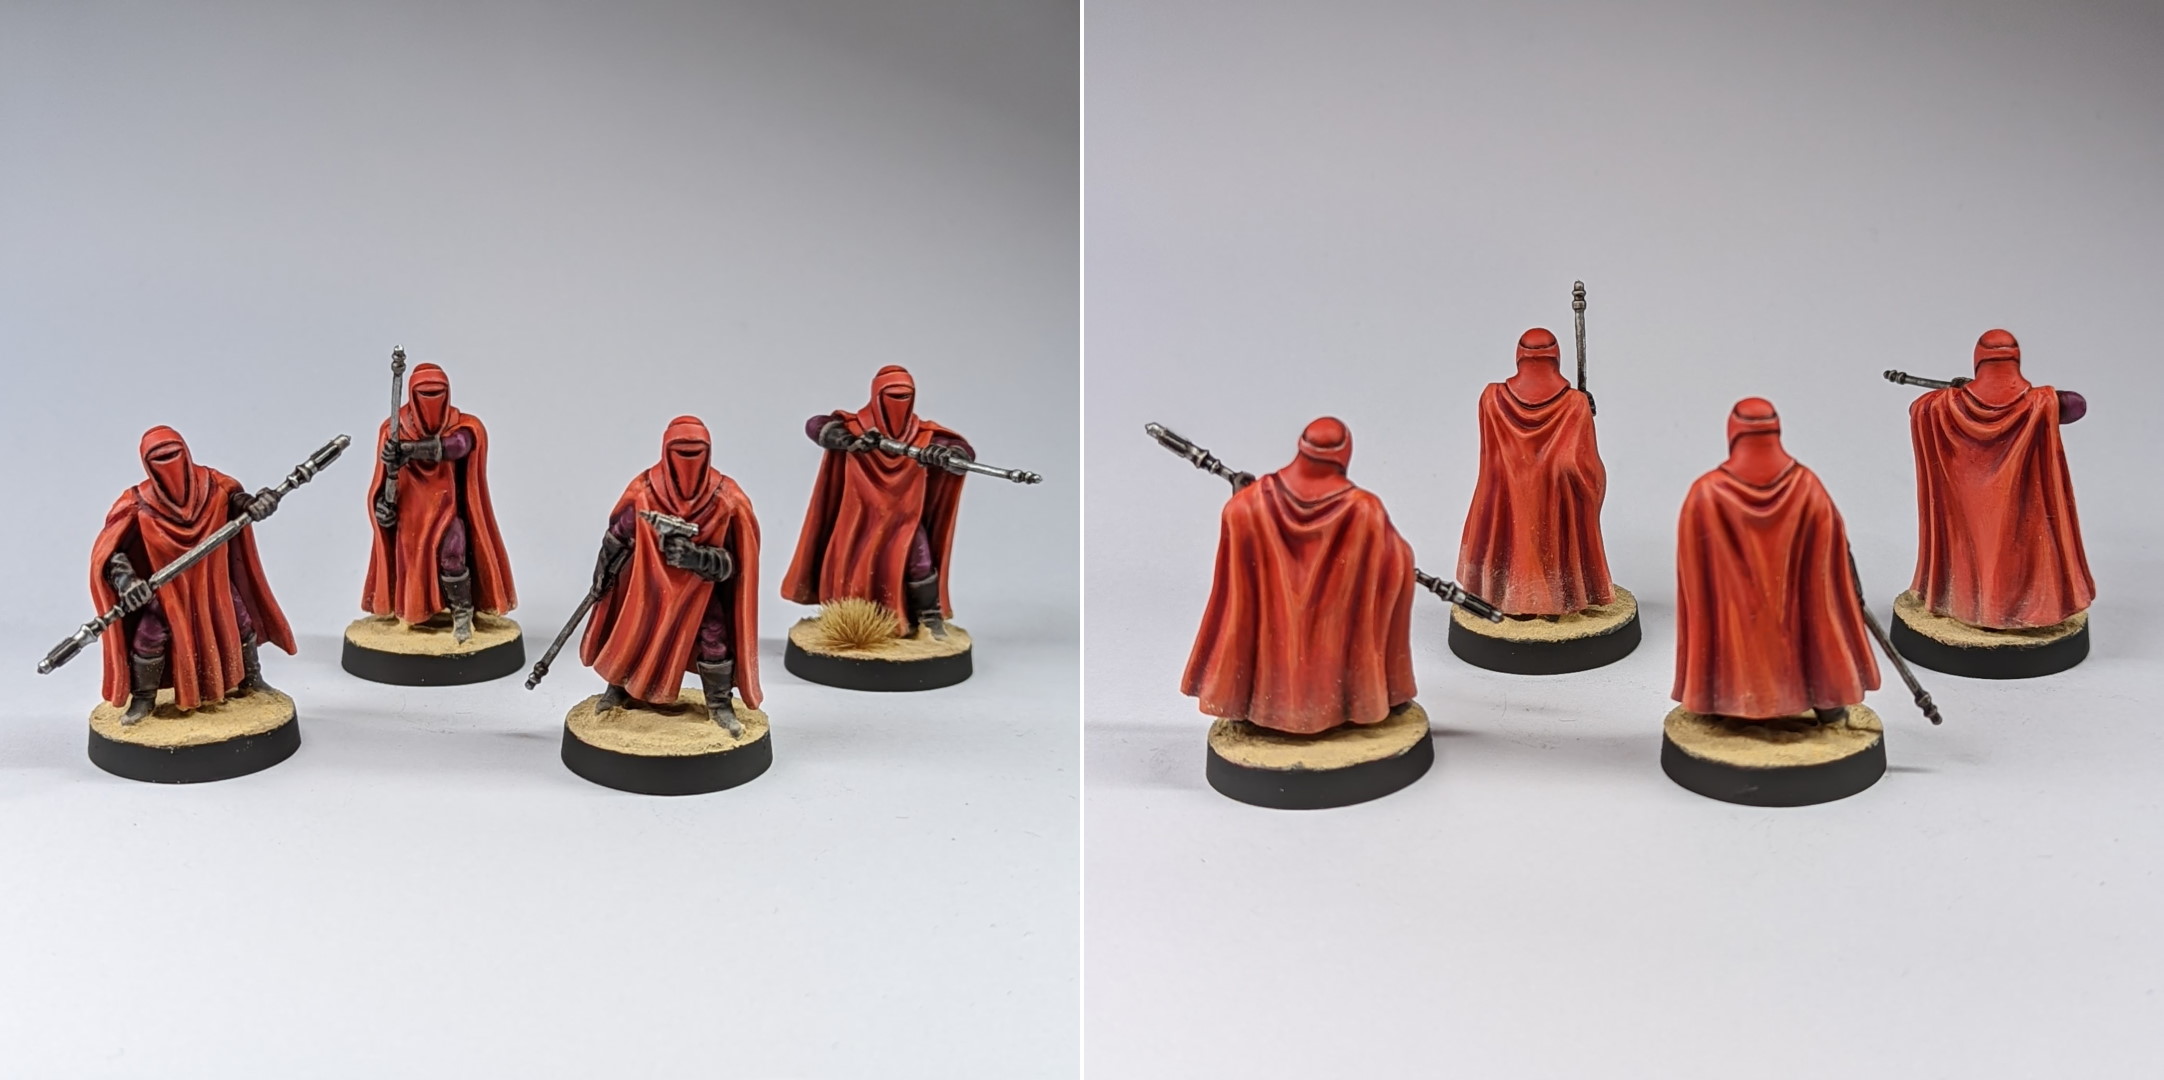
I learned a lot of about painting red over the course of building my Skaven army for Warhammer Fantasy Battles – so I pulled out every little trick I could muster for the Emperors elite bodyguard. Their red robes started from a base of Vallejo Scarlet Red with a thin airbrushed coat of Bloody Red. Once this had dried, I switched to hairy brush and started to build up layers of saturation using the rich but kind of translucent Bloody Red again. Towards the folds, I started to add increasing amounts Orange Fire into the layers until finally adding some Rosy Flesh into the mix to edge highlight the sharpest edges. This sounds like a lot of steps, but it seemed to take no time it all. It helps that the squad is reasonably small – clocking in at only four models – but I think the paints themselves helped matters as well. Most of the red paints that I used in this process are fairly translucent without thinning, which make them really easy to build up smooth layers of gradient with. By the time I’d finished repeating a step on the 4th mini, the 1st would be dry and ready for the next step. Thanks to how translucent the paints were, I could be fairly haphazard with my painting as any one layer isn’t going to muck things up until you start to properly edge highlight things.
The trousers were also pretty simple, being Screamer Pink, highlighted with a little added Elfic Flesh and washed with Carroburg Crimson to get that reddish purple colour. The boots were a quick Black with added Elfic Flesh job. For the helmets, I kept things simple and painted these a flat Bloody Red with thin, neat highlights of Rosy Flesh and sharp, black shadows in the recesses – this helps to imply the material is a smooth plasteel despite being the essentially same colour as much of the robes.
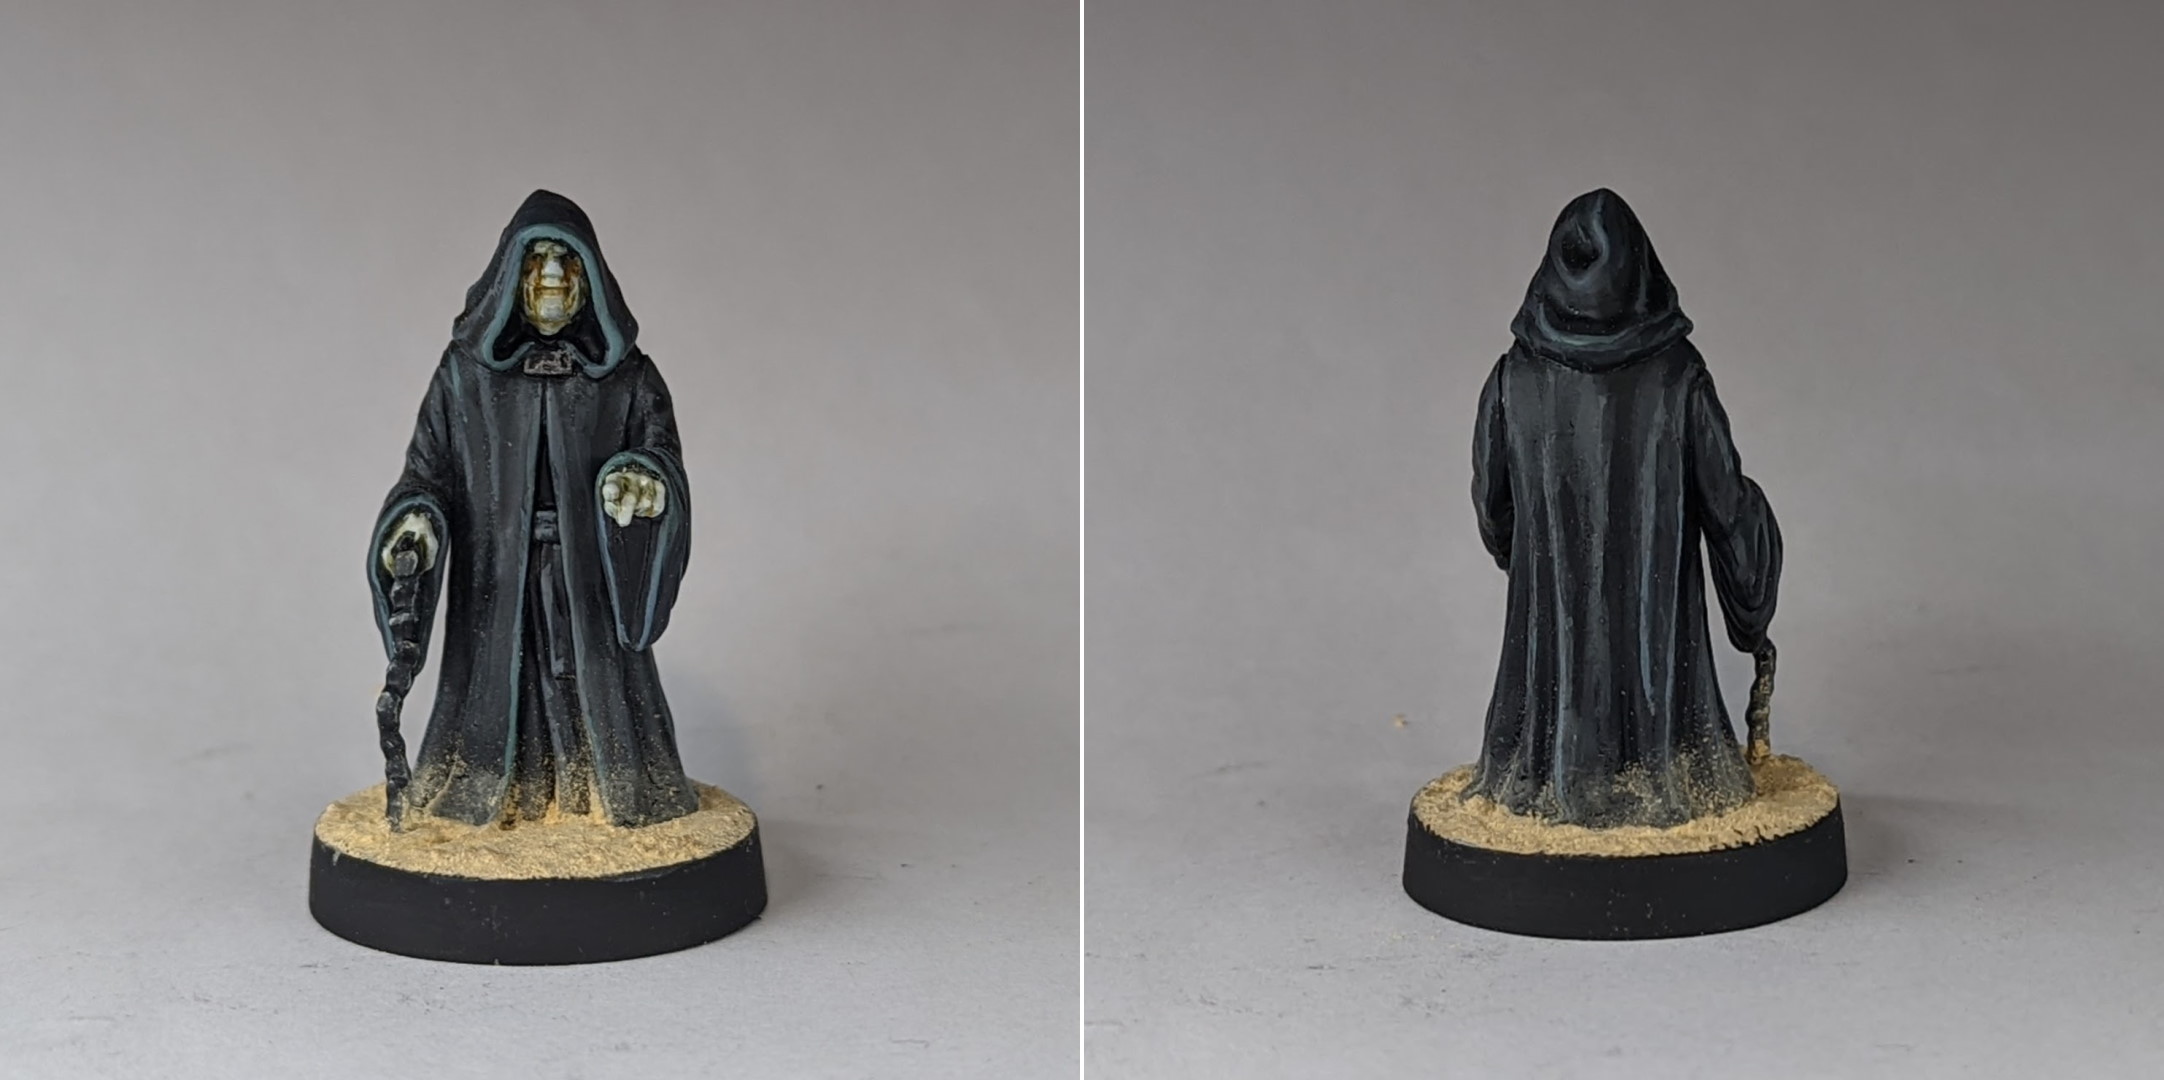
On his own, Palpatine was an absolute doddle. At first, I highlighted him in my usual fashion by adding varying levels of Elfic Flesh to Black to layer and highlight his black robes. This would be a little too boring for the biggest, most evil bad guy in all of Star Wars however, so afterwards I made another pass with a little Turquoise mixed into my greys to give him a little bit of a nocturnal glow.
Painting the Emperor’s face was pretty quick and painless too. For this, I basecoated him in Dead Flesh and washed with a mix of Biel Tan Green and Reikland Fleshshade to give him a bit of a pallid tone. Next, I picked out some of his raised features and, erm.. skin folds with Dead Flesh and a little Elfic Flesh on the extremities. As a final touch, I put a little Leather Brown on my palette, watered it down into a glaze and painted in little streaks going down from his eyes to capture that gross, crusty yellow around his peepers. I think it turned out quite well, and adds a little extra visual feature to an otherwise fairly simple miniature.
The next addition to the army was Iden Versio and a squad of Death Troopers.
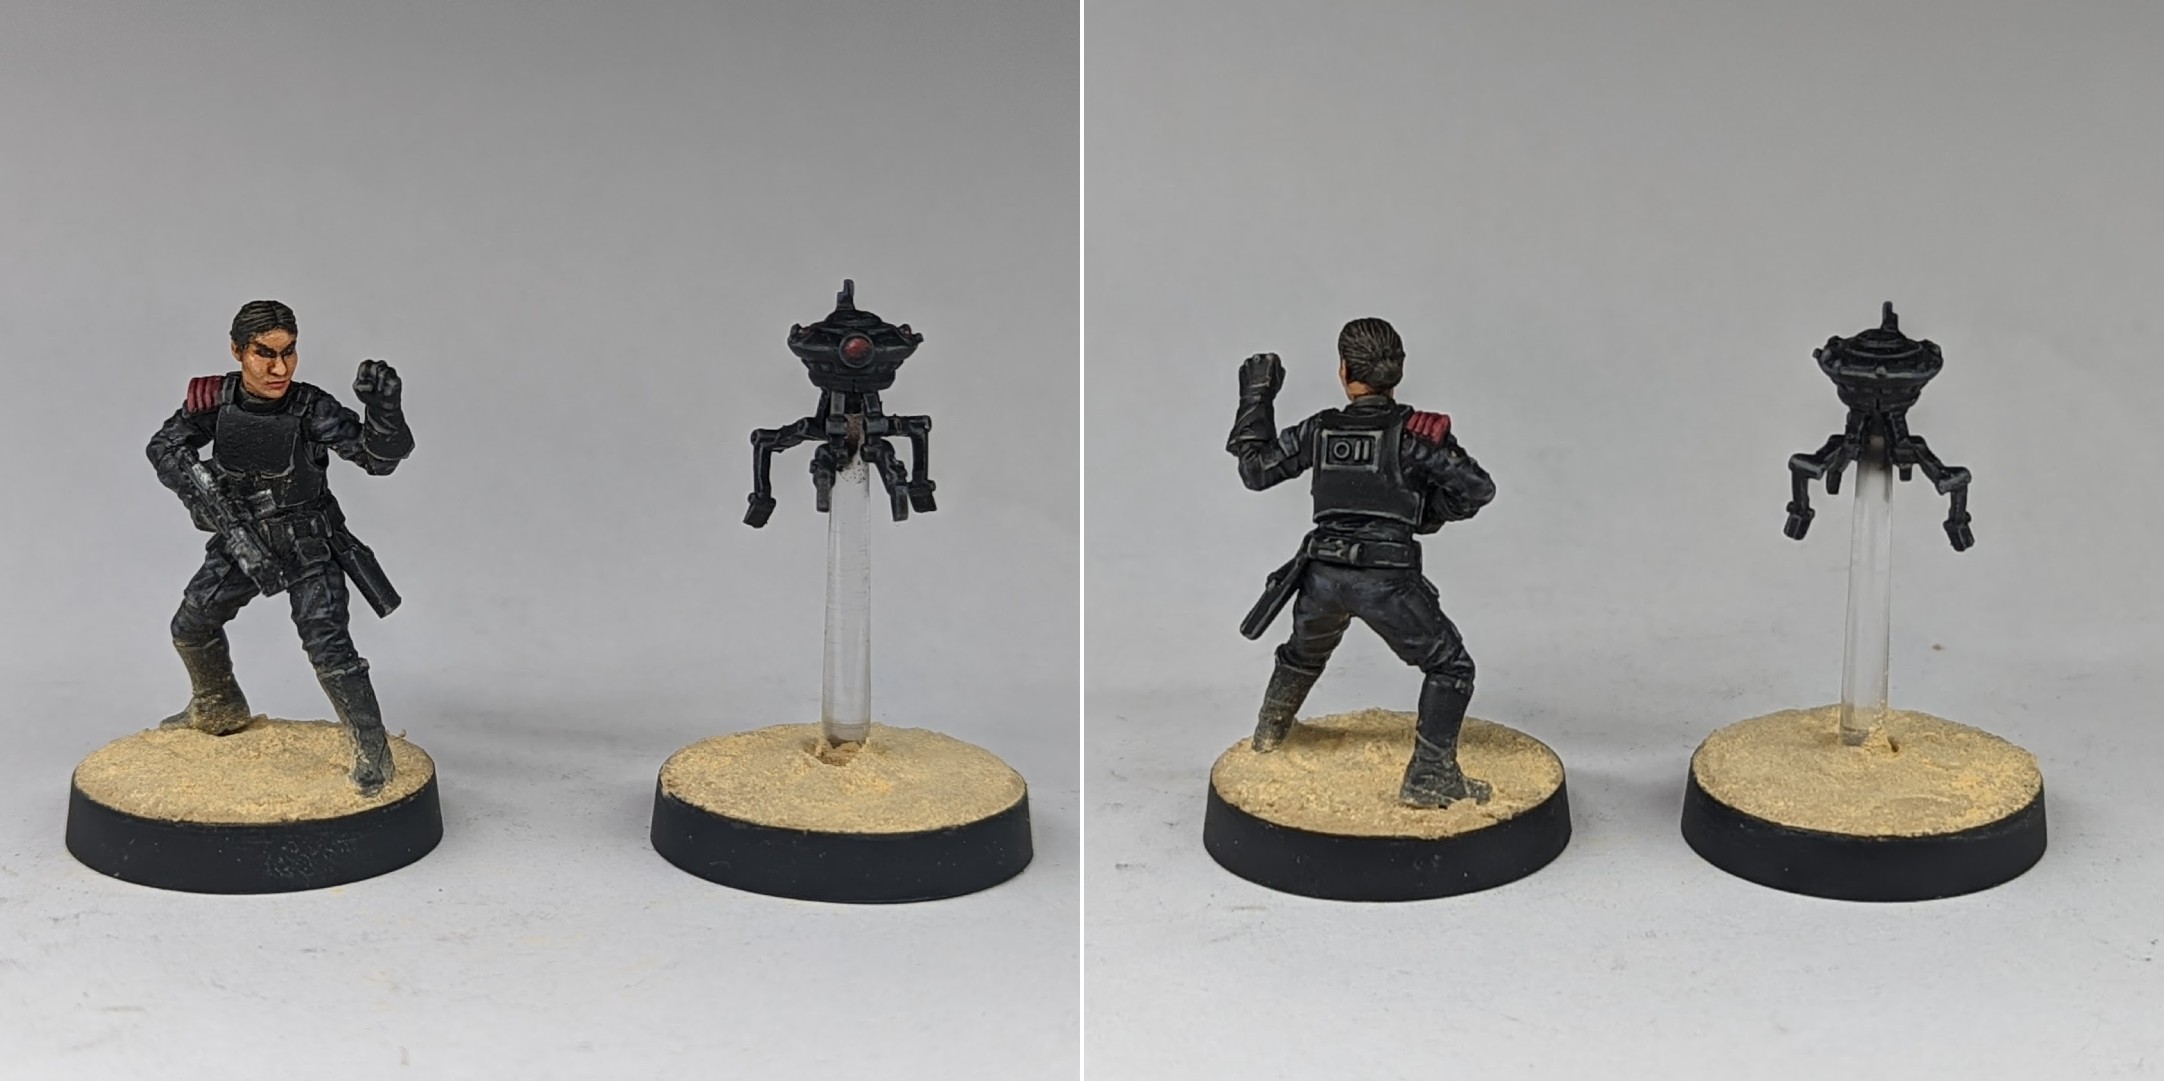
At this point, I was getting pretty immersed in Star Wars again – listening to Star Wars lore videos on YouTube, playing Star Wars video games when I was too tired to paint – and after playing the first part of the Battlefront 2 campaign, I absolutely had to pick up Iden Versio.
This was a cool mini and a pretty good likeness for the character overall. I liked that it was a hard plastic mini and that came on a sprue. I liked having multiple weapon options to choose from (although I won’t be so pleased if WYSIWYG is a hard and fast rule for characters like these in organised play). I especially liked that she comes with her ID10 Droid ‘Dio’, although I’m not so keen on the disproportionate size of Iden’s head. It feels a little at odds with the rest of the Empire range – and was a big reason why I opted against picking up Inferno Squad as a whole. The models just look a little goofy with all their oversized helmets, in particular.
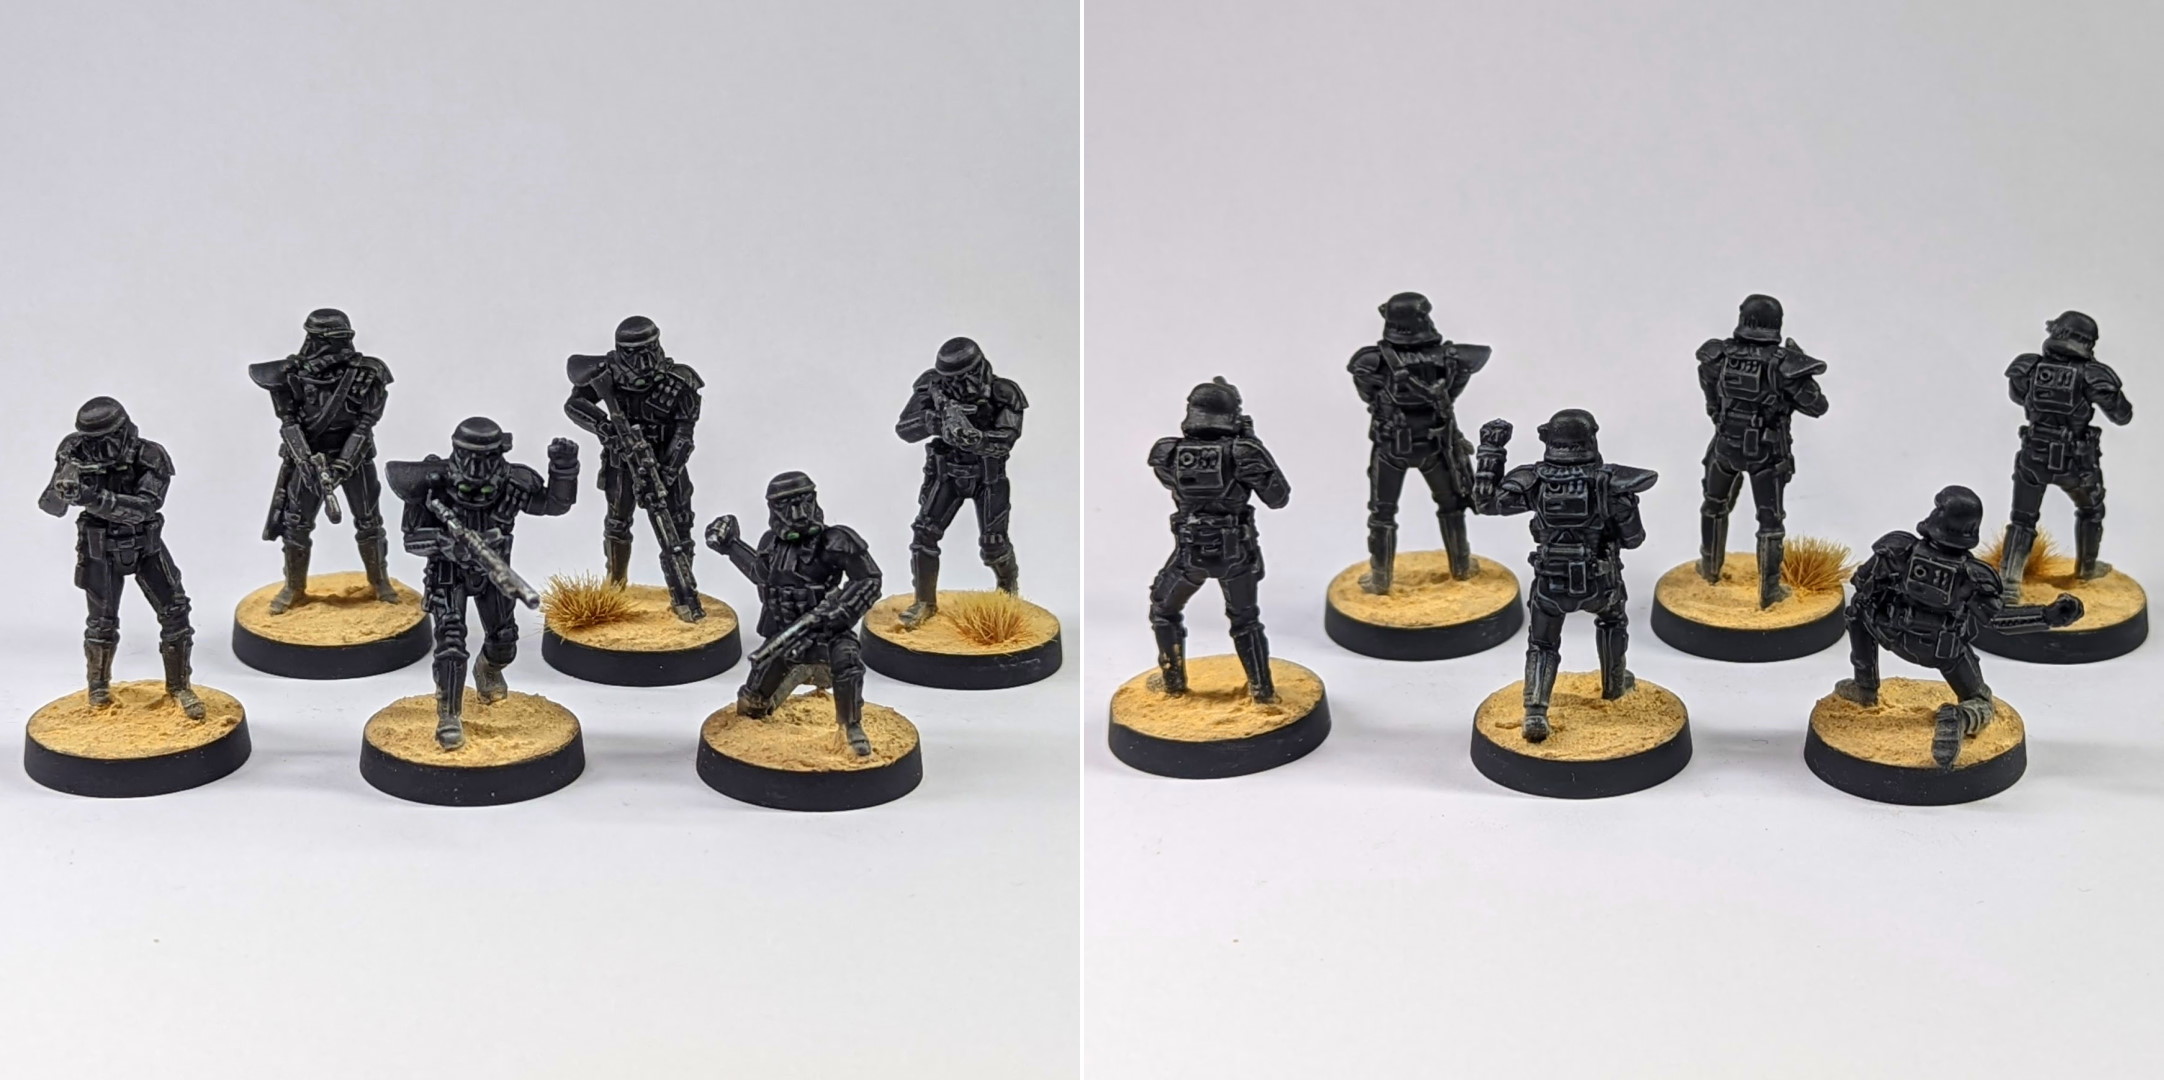
Instead, I scratched the special forces itch with a unit of Death Troopers – which were by and large the single most time consuming unit I’ve painted for Legion so far. While I can generally get away without any edge highlighting on squads of Stormtroopers, you sort of don’t have a choice here when it comes to painting black. On these minis, I primed them black, gave them a quick zenithal with Panzer Dark Grey and a wash with Nuln Oil Gloss. Afterwards, I went in and edge highlighted all of their edges with Cold Grey, tidied up my lines with Nuln Oil and Black and then picked out some specular highlights on the corners with a Cold Grey/Elfic Flesh mix. The guns were painted Plate Mail Metal and washed with Nuln Oil, then the lenses and uhh.. mandibles? on the helmets were basecoated Goblin Green and highlighted with Lime Green and a single dot of Elfic Flesh. Nothing overly complicated, but pretty time consuming to do all that edge highlighting. Still, I’m super pleased with how they turned out in the end. The detail pops, and I’m very pleased with how distinctly ‘black’ the colour reads at a glance – often the hardest part about painting that colour.
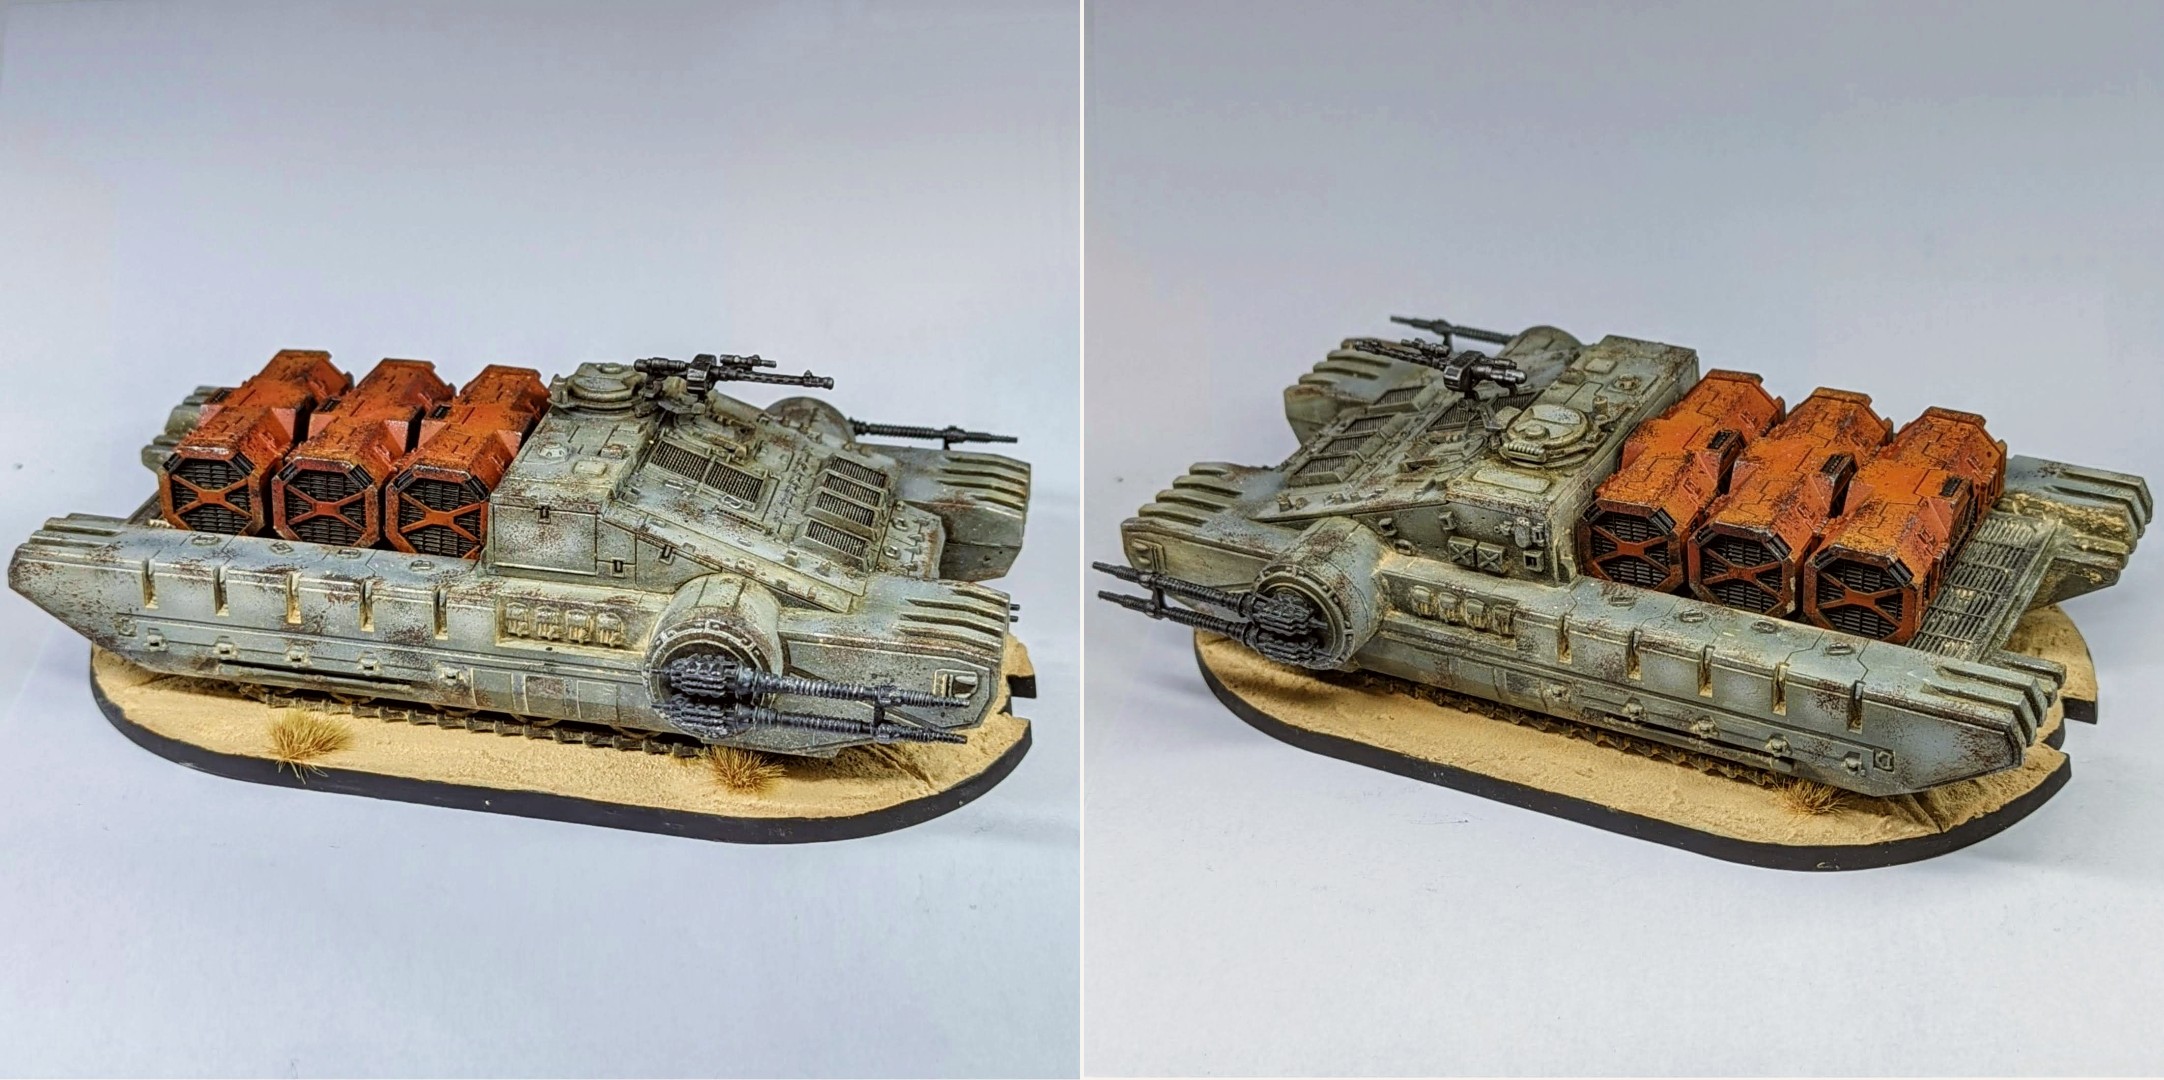
The last thing I have to show off in this instalment is another vehicle model – the TX-22W GAVw Occupier Assault Tank. This vehicle was a lot of fun to work on – as my second attempt at an airbrush and weathering approach to painting vehicles, I was able to apply a lot of the lessons that I learned on painting my AT-ST walker here.
Assembly of this one was pretty trivial, for the most part. The main hull of the tank comes as a single piece, as do each of the three cargo crates on the back, which I left separate as subassemblies for easier painting with the airbrush. All that was required here was gluing on the tank tracks, the weapon sponsons, driver hatch and pintle gunner hatch. I’d actually planned to have a pintle gunner present on this one, despite my general aversion to this on Warhammer miniatures, but I ended up having a little too much trouble lining up the hands with the gun in the end. I abandoned the idea, and opted to glue the driver hatch shut while I was at it. Turns out, with a little bit more research, this wasn’t the smartest move – as this implies the vehicle has no-one in the drivers seat. Whoops. Kind of a weird tank transport, in retrospect – with it’s exposed driver and entirely open-topped approach to troop transportation.
The painting was the fun part on this one however. This time around, I started by priming the tank hull in Stynlrez Grey, and slowly built up some volumetric highlights with the airbrush around all of the edges and in the centres of panels. First using Cold Grey, then Stonewall Grey, then a 50:50 mix of Stonewall Grey and Aged White. After this, I took a 50:50 mix of Charcoal Grey and Cold Grey and applied to to the underside and recesses fill in the obvious shadows. This resulted in a pretty drastically highlighted model – although my experience from the AT-ST has taught me that any subtle highlights will ultimately be lost after the shading and weathering. I switched to my hairy brush and painted the pintle weapon in Plate Mail Metal, the sponsons and tracks Charcoal and the various vents, clips and the bottom of the cargo area in a Vallejo Metal Color Steel and shaded them with Nuln Oil.
Once the base coats had dried, I airbrushed a thin coat of Streaking Grime onto the model and got to work wiping it from the edges and towards the various panel lines and recesses. This looked okay, but I found this brown shade combined with the Aged White in the highlights kind of pushed the tank a little too far towards cream than grey, so I took out my airbrush again and went over a bunch of the highlights again in clean Stonewall Grey, this time only using White to push the brightness. Not only did this correct the course back to grey, but it added another level of contrast to the shading and highlights – not unlike layering the base coat again after a shade.
While this was drying, I started working on the base and the crates. The base, as per usual, I primed in Black then covered the top with AK Interactive Desert Sand. Once this had dried, I glued a couple AP Mountain Tuft and dusted a bunch of Vallejo Ochre Pigment Powders over the surface. For the Crates, I base coated these in Stynylrez Grey, then airbrushed layers of Ferrari Red, Hot Orange, Orange Fire and Bad Moon Yellow, focussing the brightest layers towards either end of the Crates with a solid mid tone right in the centre. When dry, I picked out the side grates with a Metal Color Steel and shaded them with Nuln Oil.
Now for the fun bit – weathering! Once again, I took a little ripped up bit of sponge, dipped it in Typhus Corrosion, dabbed it off on a paper towl and went to town on the tank and the cargo crates. As always, the focus was deliberately around all of the harshest edges and corners, but I made sure to put a few sparse scrapes on the flat surfaces as well. When I was finally happy with the level of coverage, I went through the process again using Black and then Plate Mail Metal to get the same scraped, battered and laser burnt weathering as before on my AT-ST. The guns were drybrushed with Plate Mail Metal and then washed with Nuln Oil once more to dial it all back again. With the weathering done, I glued the tank onto the base, varnished everything and then made sure to get some weathering pigments onto the tank tracks and up the sides of the vehicle in all the recesses1 to get it nice and sandy, like it’s been driving through the desert kicking up dust and debris. In the end, I decided against gluing the crates onto the vehicle – I kind of like the idea of them as optional terrain pieces, or being able to load them on and off for custom scenarios. Even just having the option to run the tank without any cargo is neat. I came close to buckling and gluing them on there during the process of trying to photograph this mini though, so we’ll see how long that lasts.
I’m pretty happy how this one turned out overall – it’s a lot closer to a proper execution of this “historical” style of painting vehicle miniatures, with fewer mistakes and awkward missteps than on my AT-ST. It’s got a satisfying amount of depth to it and plenty of texture, while still kind of reading as a flat grey. The orange crates also do a great job of giving this mini a little pop of colour, and overall I just find it very aesthetically pleasing.
So, that about wraps up this instalment of Now I Am The Master. My Galactic Empire army is starting to look pretty fleshed out now, with 3x Commanders, 3x Corps units, 3x Special Forces, 2x Support and 2x Heavy. Now that the army is really starting to take shape, I’m hoping indulge in some of the fun optional extras like Operatives and Specialists.
Until then, thanks for reading and happy wargaming!
1 That’s sand for you – it gets everywhere.