Hello and welcome back for the concluding part of my journey into Star Wars Legion! With my Galactic Empire army done and dusted in Part Four, I plan to wrap things up with this final instalment – showcasing some of the terrain that I’ve painted and/or purchased to enable fun, immersive games in the Star Wars universe.
First things first, let’s have a look at some of the simple scatter terrain – these are some resin Cargo Crates from Micro Art Studio.
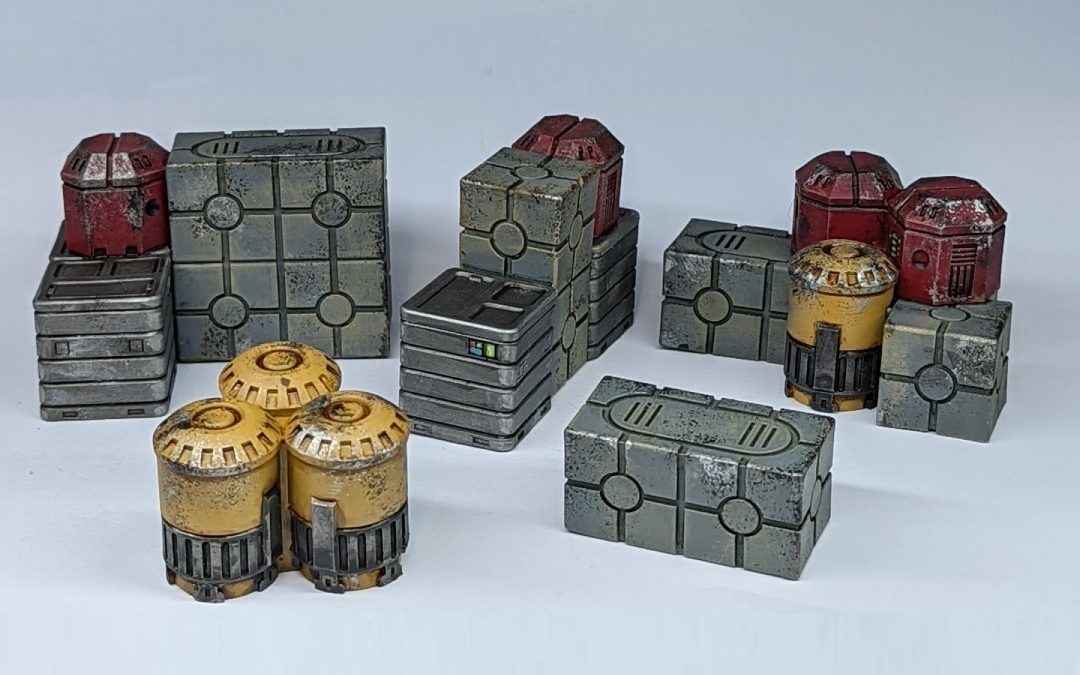
I had no idea that Micro Art had a whole range of Legion terrain – but most of it is pretty cool. I ended up stumbling upon this set while trying to fill the base for my AT-ST, hoping to find a less expensive source of Star Wars crates and containers than the Priority Supplies set from FFG. I ordered these in a flash, assuming they’d be the same size as FFG’s objective marker crates. This was.. not the case. I probably should have put a mini in the above photo for scale purposes, but this set is roughly twice the size of the little cubes and cargo containers that FFG make. Unfortunately, this also meant that they didn’t really fit on the base that I’d intended them for (and why I went with a 3D printed Gonk Droid in the end). Still, every cloud – they make really good scatter terrain! The stacked crate pieces are fully line of sight blocking for infantry, while the barrels and singular crates make excellent chest high barricades.
They weren’t too tough to paint either. I primed the whole lot in grey, then threw down a Heavy Red base coat on the hexagonal boxes, Gun Metal on the ribbed crates and Filthy Brown on the little cylinders with Gun Metal on the lining. I then followed up with a pin wash in the recesses. Grey Blue enamel wash for the boxes, Nuln Oil for the Red and Metal crates and Seraphim Sepia on the yellow brown. A quick drybrush with Khaki to catch the edges, some sponge weathering and a little bit of red/blue and green for the lights and buttons and they were sorted.
With none of the pieces missing, I was free to build the Priority Supplies kit as objective markers, as intended.
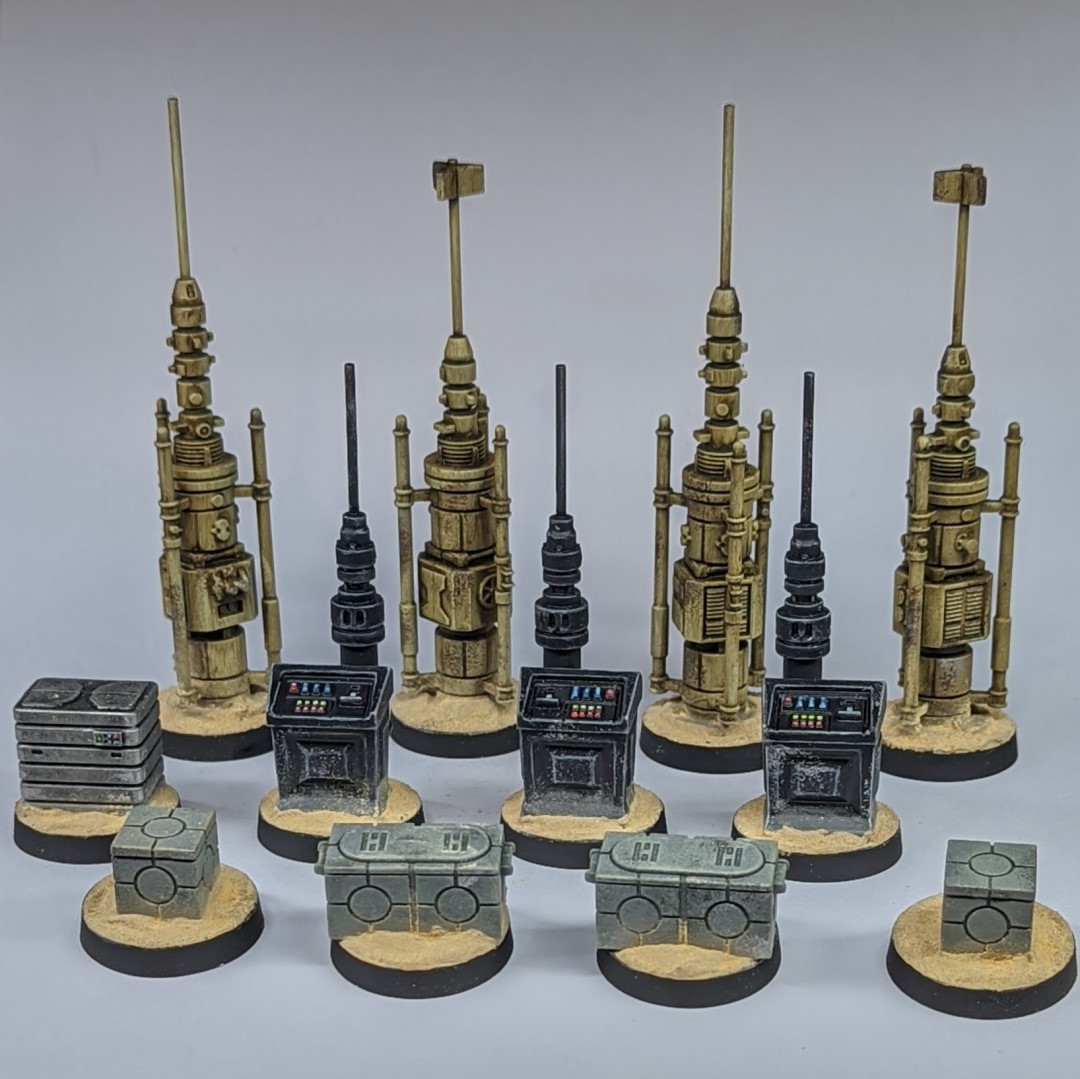
I knew from moment one that if I was going to put together a set of terrain for Star Wars Legion that I was going to set it on Tatooine. No other setting is quite so synonymous with the franchise to me – having appeared in two each of the original and prequel trilogy movies as well as all three of Disney’s Star Wars TV shows released at the time of writing. This was partly why I based my Empire army the way that I did – and why I was so keen to pick up this set of scatter terrain. Nothing quite says Tatooine like Moisture Vaporators.
I came close – really very close – to putting a couple of those crates on my AT-ST’s base. They filled up the empty space in a much more satisfying way and natural way than the solitary Gonk Droid did. And yet, I couldn’t quite shift the notion that maybe there were 5 crates in this kit for a reason. In the end, I’m glad that I didn’t use them there – as a brief read through the scenarios revealed that the pieces in this kit were picked specifically as thematic Objective markers for the various different game types.
As you might expect, these were pretty quick to knock out as well. I used the same technique as before for the crates, while the Comms units were base coated in Charcoal, washed with Nuln Oil and edge highlighted in a Black/Elfic Flesh mix. I did a little sponge weathering and picked out the buttons in red, green and blue then called it a day. Not difficult, although probably the most time consuming models in the kit thanks to the edge highlighting.
The Vaporators on the other hand were painted in a flash. These were simply primed, base coated in Aged White and then given a wash with Streaking Grime. The enamels were then wiped from the surface with a cotton bud soaked in white spirits using a downward motion to create the damp, streaking visual effect.
Next up on my list of official FFG terrain was the Crashed Escape Pod.
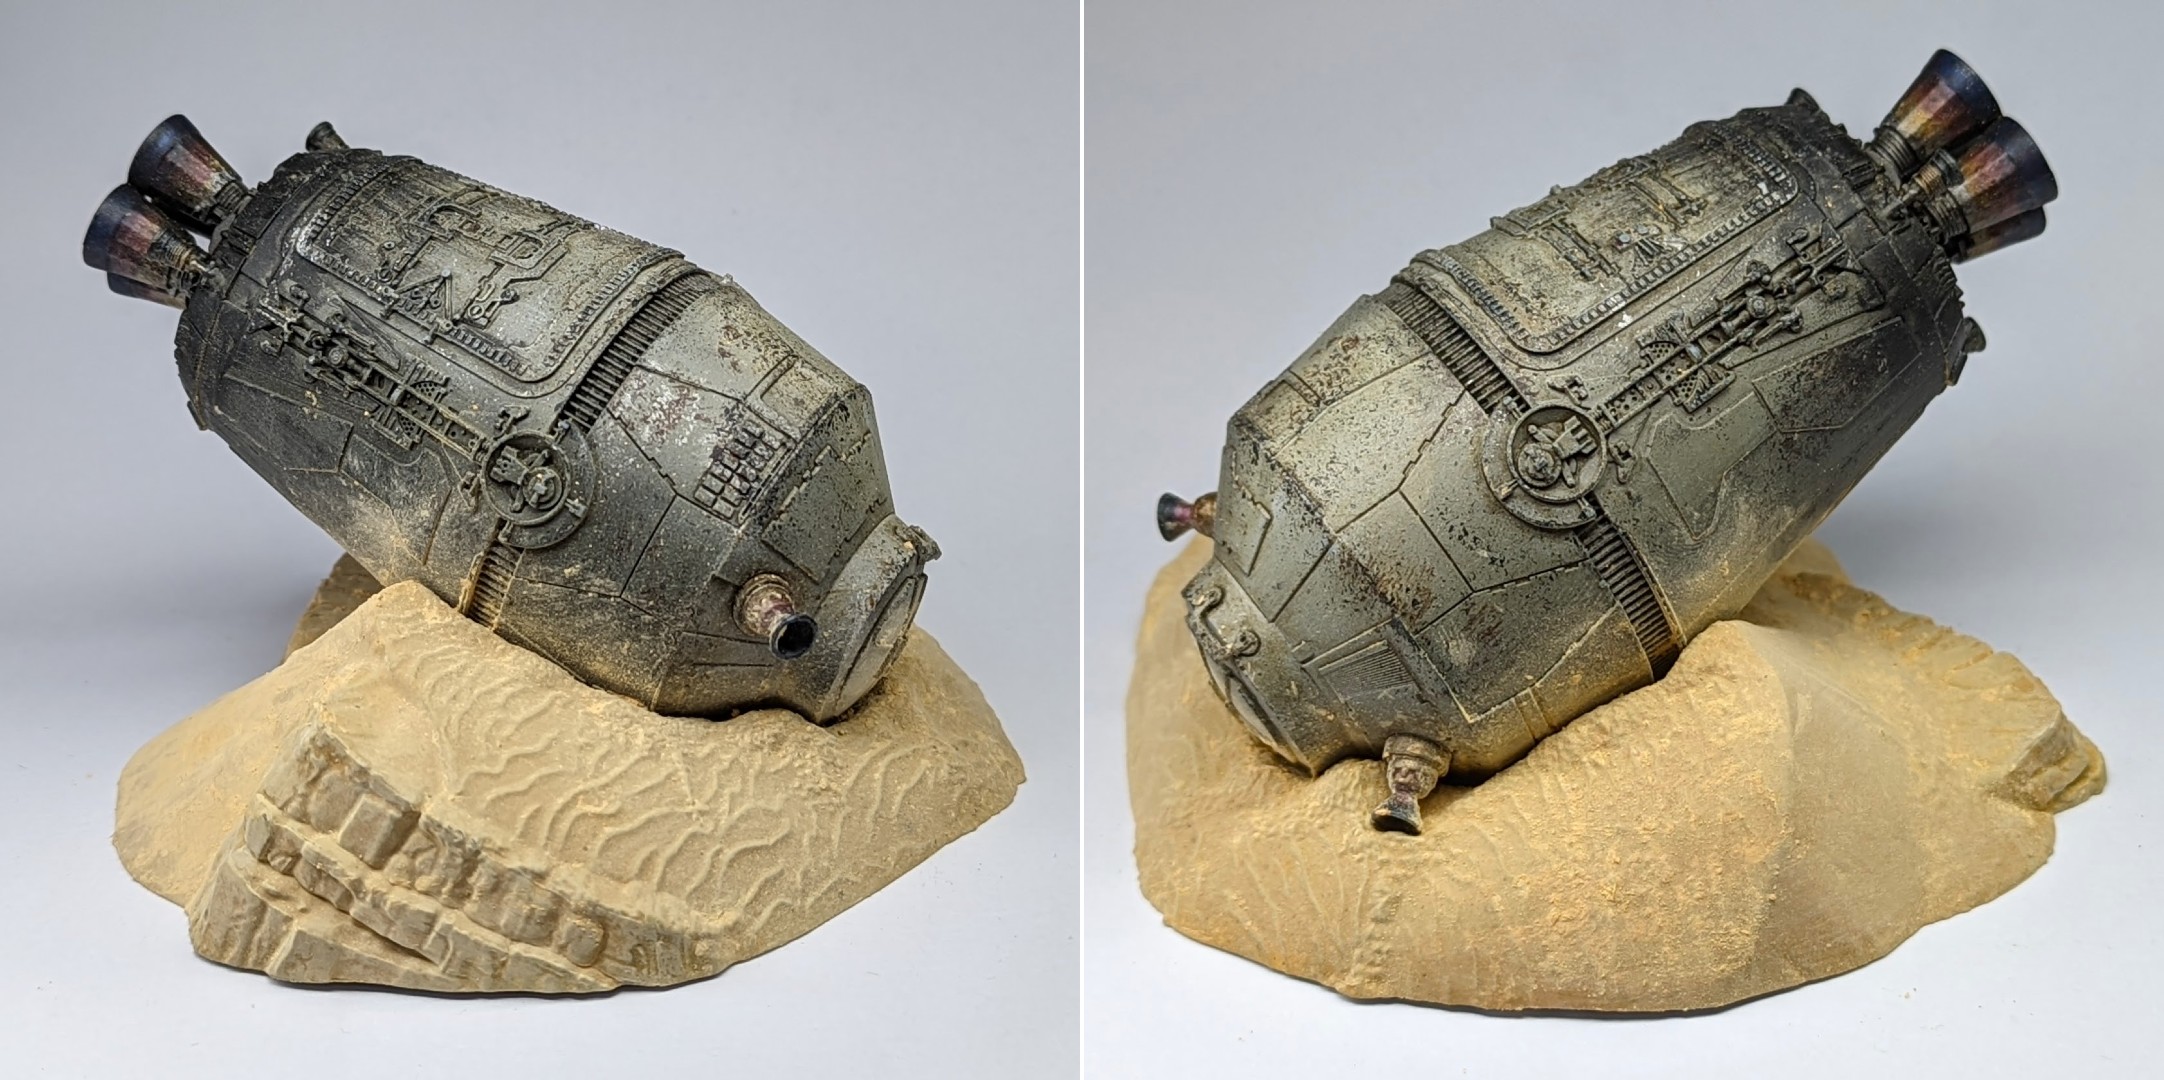
Having discovered that FFG’s terrain kits all come with unique scenario cards, I found myself compelled to pick up a few more of them, the first of which was the Crashed Escape Pod. Once again, this terrain set really suited the theme that I was aiming for – the sandy Tatooine desert. To that end, I kept the base piece really simple – I airbrushed a little yellow gradient onto it before pretty much dipping it in weathering pigments for the matt, sandy texture. Some of this I attempted to seal to the surface with some matt varnish through my airbrush, then I followed up with another dusting of pigments after this had dried. The effect looks okay – maybe a little a bit basic – but it ties in well to the rest of my Tatooine basing.
For the Escape Pod itself, I started with a coat of Grey Stynlrez Primer and then airbrushed Cold Grey over the whole thing. Holding it by the jet thrusters, I then applied a few layers of Stonewall Grey in a line along the uppermost facing side of the escape pod and Charcoal along the bottom. Once the darkest and lightest highlights were down, I went back in and blended the gradient a little bit by mixing Cold Grey with Charcoal and Stonewall Grey to get a nice gradient from the darkest to lightest colour. After this had dried, I thinned down some Streaking Grime with a little white spirits and applied it like a wash, taking care to ensure it filled up the recesses and wiping the excess off of the flat surfaces. Once dry, a light drybrush with Khaki helped pick out the raised edges and details again.
The last detail was the Jet Thrusters, which were painted in Plate Mail Metal and washed with Nuln Oil, then glazed with receding layers of Seraphim Sepia, Carroburg Crimson, Druchii Violet, Drakenhof Nightshade and finally a little Guilliman Blue around the rims to give the appearance of heat staining. As a final touch, I put a little Charcoal on a dry brush and brushed this down from around the base of the thrusters over the bottom of the escape pod to simulate carbon scoring. Finally, I glued the pod to the sandy base, varnished the model and applied a some additional weathering powders to the pod itself to make it look like it had kicked up the sand on impact.
A neat little bonus is that you get C-3PO and R2-D2 as part of this set.

I wasn’t sure if I’d ever get the opportunity to paint these minis, given that I have no (current) plans to start a Rebel Alliance army. Fortunately, these minis not only come packaged with the escape pod, but are a vital part of some of the scenarios that use it.
C-3PO was airbrushed with Vallejo Game’s more reddish Glorious Gold then given a zenithal with Metal Color Gold – a more champagne gold. This was washed with a thinned down coat of Reikland Fleshshade and highlighted on the edges with Shining Silver. His wiring was painted in Heavy Red and Heavy Blue and washed with Nuln Oil while his eyes were picked out in Filthy Brown with a tiny highlight of Elfic Flesh on the upper, outer edges. Quick, simple and satifying!
R2-D2 was, in fact, much less complicated to paint than the R5 Astromech I painted from the Imperial Specialists kit. Some of this is due to crisper detail from a higher quality hard plastic miniature, but honestly I think I just found it easier to paint the detail of this miniature in white than I did in black. R2 was primed in white and had his helmet painted Plate Mail Metal before getting a thinned down wash of Nuln Oil all over. Next, I went and layered up the raised areas in White and the recesses in Ghost Grey before picking out the blue panels in Heavy Blue. This was washed with Drakenhof Nightshade and layered/highlighted again with Magic Blue and a little bit of Elfic Flesh. I layered Plate Mail Metal on his head dome, picked out some lenses with Heavy Red and that was that, pretty much.
A fun couple of minis that proved to be quite refreshing in between painting larger scenery pieces. Speaking of, here’s the final official terrain piece – a Downed AT-ST.

This was a fascinating kit, because ultimately it’s the same base model as my AT-ST for my Galactic Empire army, but it differs in so many ways. For one, this terrain piece is entirely made in that softer restic material as opposed to the hard plastic on the vehicle kit. This actually made assembly a little more complicated than on the plastic model, as I had to assemble the main cockpit compartment and attach smaller pieces like the guard rails myself – a very different experience to the pre-built cockpit on the hard plastic vehicle version. That all being said, this was still a very simple assembly and went together without issue.
Assembly aside, I don’t think there’s too much I need to add with regards to painting this thing. I used Charcoal as my shadow colour instead of the Sombre Grey that I used for my previous AT-ST due to how much closer this one was to the sand1, but generally speaking the painting process the exact same as before. For the base, I hand painted everything with Vallejo Model Color Light Yellow, washed with Seraphim Sepia and drybrushed with Elfic Flesh. When this was dry, I painted AK Interactive Desert Sand texture paste over all of the sand areas, leaving only the rock formations the drybrushed yellow colour. This might seem redundant – given the sand was already textured – but applying the texture paste helped keep the base colour and overall texture looking consistent with the rest of my bases. It also had the added benefit of allowing the rock formations to stand out just a little bit from the rest of the sand, as the underlying colour was just a little brighter and more yellow than the sandy texture paste.

So this about covers all of the terrain that I painted myself for Star Wars Legion. Barricades and cargo crates, thematic objective markers and a couple cool centrepiece kits for the board – there’s just about enough here for a neat looking 3’x3′ skirmish out in the desert with adequate cover from the barricades and crates. But we can do better than that, can’t we?
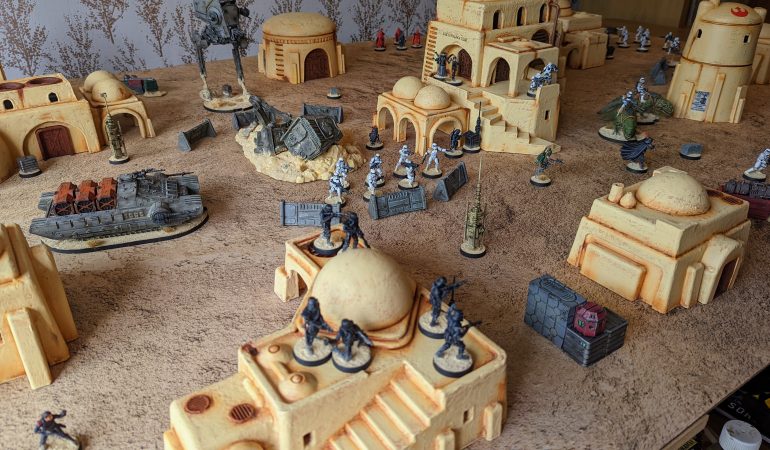
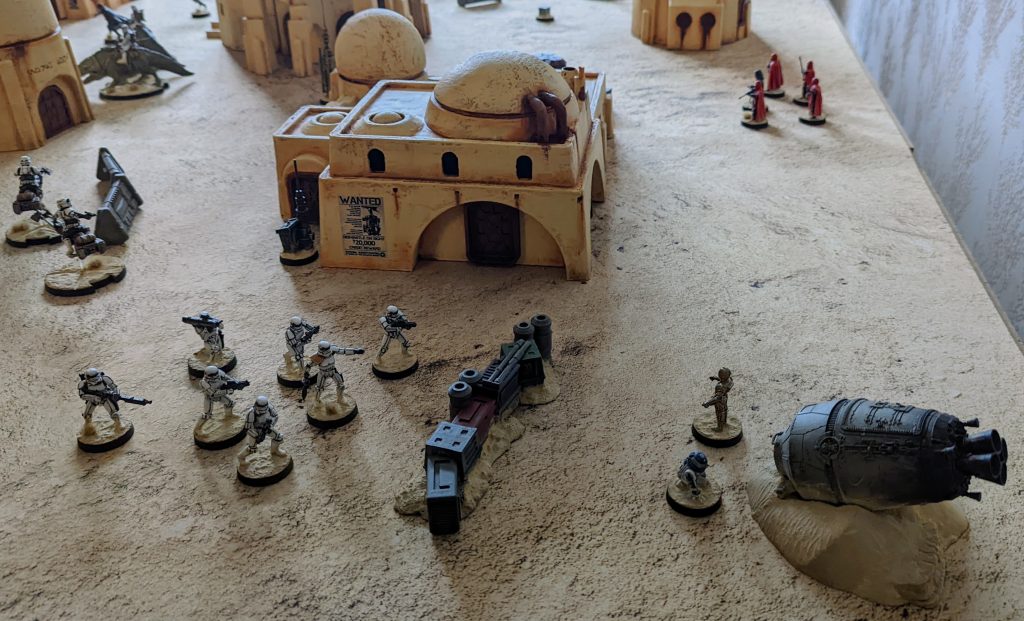
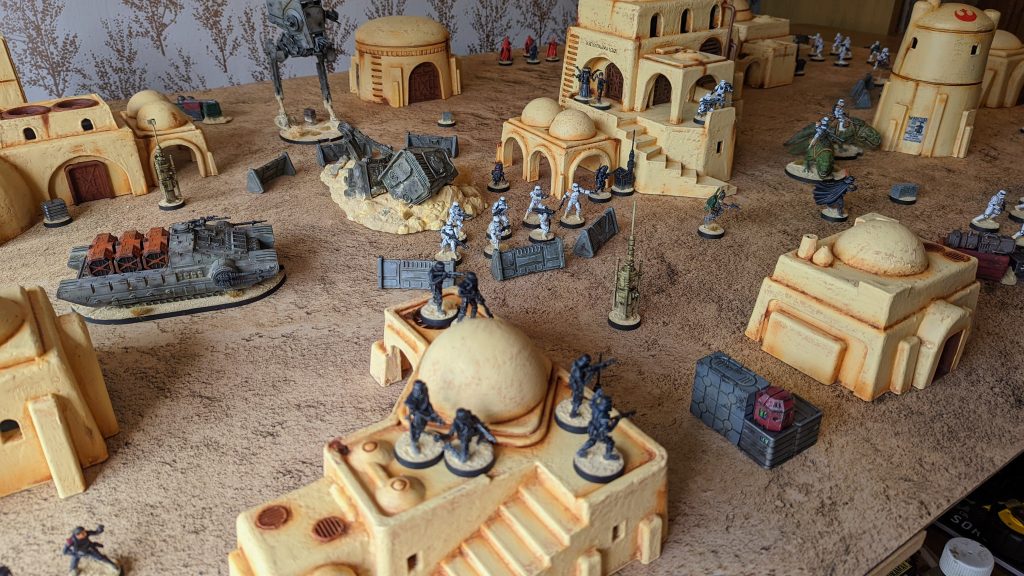
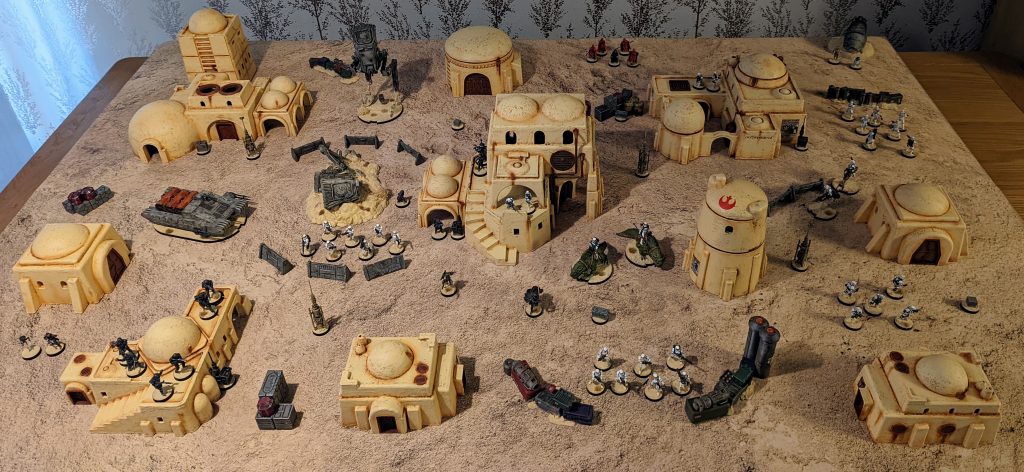
From the moment I started painting Stormtroopers, I’ve had this fantasy of a full 3’x6′ board of Tatooine-style buildings, resembling the streets of Mos Eisley. Not only is this perhaps the most unambiguously Star Wars of settings, but it’s kind of a Western and a Cityfight all in one! Thus began my search across the internet for Tatooine-style buildings. I found some neat hard foam solutions from Micro Art Studio and even some cool pre-painted resin terrain from UrbanMatz. What really took the cake however was an Etsy shop known as ArtTwoAnd3DTwo selling bespoke designed Tatooine buildings which the shop owner prints, paints and weathers himself. It’s not cheapest solution in the world, though I wouldn’t have said it’s on the expensive end of hand painted terrain either. More importantly, the design and implementation of these buildings are absolutely dripping with character. Everything about this terrain spoke to me – from the bright pastel yellows with a rich, realistic ‘clay’ like finish to the little flourishes such as weather staining, hand-painted Aurebesh and Imperial propaganda posters. There were so many different styles and designs of building, making it effortlessly easy to build a board that genuinely captures the vibes of Mos Eisley or Mos Espa.
The buildings are robust and well put together, with a terrific claylike finish that completely hides any striations from the 3D printing process. They’re weighty pieces as well, with a pretty generous – perhaps completely solid – infill. The sizeable package that I ordered arrived in good nick and was appropriately padded, with only a couple minor repairs needed out the box – some minor nicks in the paintwork at the base of buildings and some fragile bits like drain gutters having broken off at the contact point in one or two locations. All told the repairs took me maybe 20 minutes tops before the terrain was ready for the table. No complaints here – in fact the only real drawback was getting hit with an £85 customs charge. Thanks a lot, Brexit.
While I’m at it, I’d also like to briefly shout out eBay store house_of_gaming for the other set of pre-painted 3D printed cargo crates you might notice on the photos below. I originally purchased these to use as scatter cover for Zone Mortalis games of Heresy, though I found them a little bit too Star Warsy. This is an issue no longer – they now make a colourful addition to my Mos Eisley board!
Photos of the board in totality below:

And so that about wraps up my recent foray into Star Wars Legion for now. It’s been a really fun little detour away from Games Workshop, and it’s nice to emerge from this current bout of hobby with both a sizeable army and a really fun and immersive tabletop environment to fight over. I can’t wait to get some games of Legion going and crush some Rebel scum in person.
Until next time, thanks for reading and happy wargaming!
1 I feel a little weird using blue and other cold tones as shadow colours for grey miniatures when they’re in such a brightly lit, warm location with warm yellowy brown sand beneath them. This was fine on the AT-ST itself because the main shadowed areas are several feet above the ground, but a little weirder to look at on the Downed AT-ST piece. That’s not to say this can’t be done and can’t be made to look good, but it’s beyond my skill level for now.